

How To Level A Corner Garden Tib
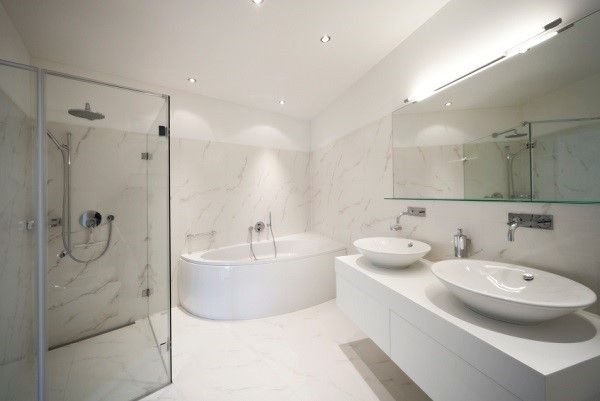
Installing a corner tub is regarded as a sensible and stylish choice for adding more space to bathroom interiors while increasing visual appeal. Corner tub installations are becoming more common amongst households that want to redesign their bathrooms. With properly-installed corner tub enclosures, it becomes easier to create more usable space within the same bathroom and this additional space can be used for adding shelves, hanging towels or being used as a storage area. Furthermore, corner tubs can be personalized to make their appearance complement the décor of the bathroom. Once a corner tub enclosure has been properly installed, it can be customized, as there are many bathroom accessories and fixtures that are catered towards making the corner tubs more functional. Some folks are known to install up-market taps or Jacuzzis within their corner tub enclosures. It may sound daunting, but adding a corner tub to your bathroom is not difficult. With a systematic and patient approach, corner tubs can be added in an uncomplicated manner.
First Consideration for Adding a Corner Tub: Bathroom Walls
If the bathroom wall doesn't look very appealing then you have two options. Either repaint the wall so that it matches the theme of a new corner tub, or use a wall divider to simply cut-off the view of this part of the bathroom.
Second Consideration for Adding a Corner Tub: Placement of the Tub
The corner tub enclosure should always be aligned along the floor space that is at a comfortable distance from the bathing area, since corner tubs are often used for just lounging while reading a magazine or a newspaper.
Installing a New Corner Tub
Step 1 - Check the Flooring
The flooring where the tub has to be installed should not be damaged. Even if it is slightly dilapidated, repair the sub-flooring and leave it to dry.
Step 2 - Plan the Frame
The corner tub will need a supportive frame to be set in its chosen spot. Usually, manufacturers of corner tubs list the instructions, explaining the exact dimensions. The supporting frame is usually made from wood.
Step 3 - Prepare the Frame
Build a basic wooden frame within which the tub will be set. Then put down mortar mix. Thin-set mortar is the common choice and depending upon the size and the weight of the corner tub, it can be one or two inches thick. Prepare the mortar mix and spread it evenly on the chosen spot.
Step 4 - Check the Piping
The piping fixtures that will connect to the corner tub should be installed before the tub is set in its place. The piping and plumbing is always re-checked as it is practically impossible to repair them after the tub sets itself on the mortar mix.
Step 5 - Place the Tub
Along with a helper, place the tub on the wet mortar floor. The corner tub should rest on the bathtub rim. Shims can be added along the bottom of the corner tub to level it with the rim.
Step 6 - Finish Connections
This should be followed by attaching the shower fixtures. Tighten the tub's slip connection with the drain pipe and secure it with nuts. Check the drainage flow within the corner tub for its flow into the putty. Once this connection is confirmed, press the drainage pipes into their position and tighten them with a strainer cap.
Step 7 - Install the Spout
Measure the tub's spout - the distance to be measured is from the front-end of the drain nipple that lies within the wall to the wall-facing the tub. Now, measure again, from the thread coupling that lies within the spout to the outer edge of the spout and add an additional ½ inch. The spout should be able to meet the internal threading. If this does not happen, just increase the length of the nipple. For this purpose, brass nipples are highly recommended. Then, seal the threads with an acrylic compound.
Step 8 - Seal with Silicone
The area around the corner tub can be secured with water-proof silicone.
Sometimes caulking is recommended along the area that separates the corner tubs from the walls to prevent water damage to the skirting and the edges of the tub as they are continuously exposed to water.
How To Level A Corner Garden Tib
Source: https://www.doityourself.com/stry/add-a-corner-tub-to-your-bathroom
Posted by: millardfornow38.blogspot.com
0 Response to "How To Level A Corner Garden Tib"
Post a Comment